This is the second part of our migrating from Windows 7 to Linux guide. We talked about general preparations in the first guide that looked at choosing the right Linux distribution, finding out if a certain Linux flavor supports needed features or software, or how one would go about migrating data to Linux.
Microsoft will retire Windows 7 on January 2020 for home users and small businesses. The company won't release security updates for the operating system after January 2020 which means that any vulnerability that is detected after January 2020 remains unpatched.
While Enterprise customers may extend that period by up to three years, no such option is available for anyone else.
Windows systems can be upgraded to Windows 8.1 or Windows 10; Linux is an alternative and while it certainly means more getting used to time it is free and relatively easy to setup and use.
In this particular guide, we'll walk you through the creation of system backups of the Windows installation and Linux media creation.
Creating a backup

While you don't need to create a backup of the Windows installation if you plan to switch to Linux, it is recommended that you do as it provides you with an option to restore data should the need arise.
You could backup only personal files and data instead of the entire system. It is ideal if you have a secondary hard drive or external Flash drive that you can store the backup on.
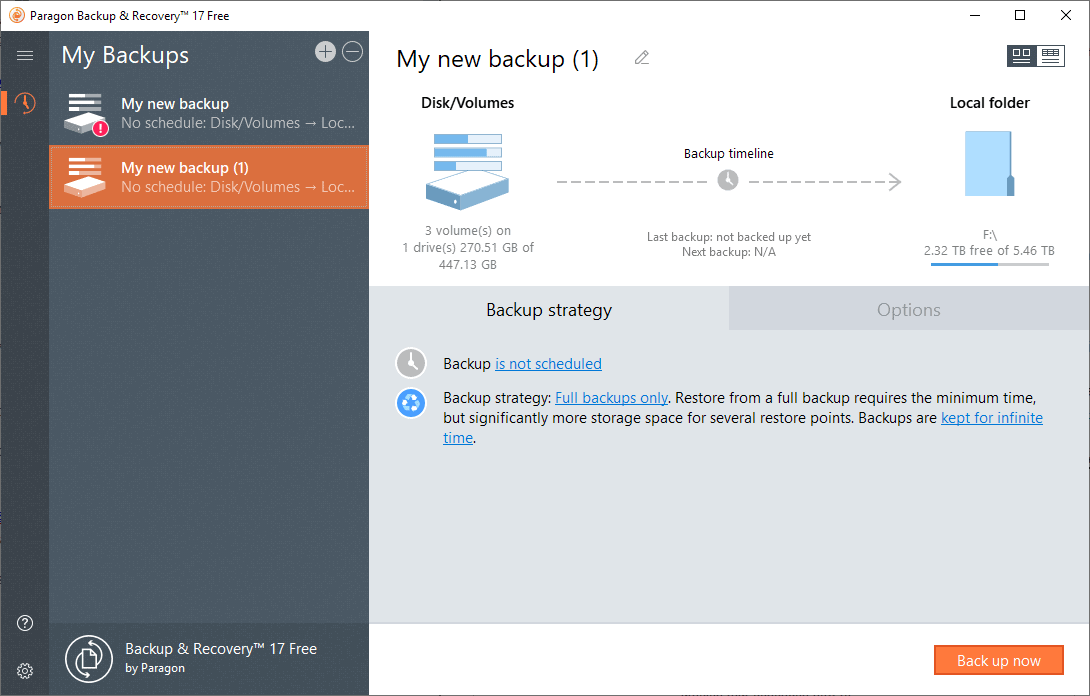
We use the free Paragon Backup & Recovery to create the backup. Download it here from the Paragon website.
You can use other backup software, e.g. Clonezilla or Macrium Reflect as well; just make sure that it includes an option to create recovery media that you can boot from.
Installation of Paragon Backup & Recovery is straightforward. Note that you do need to create an account on the Paragon website.
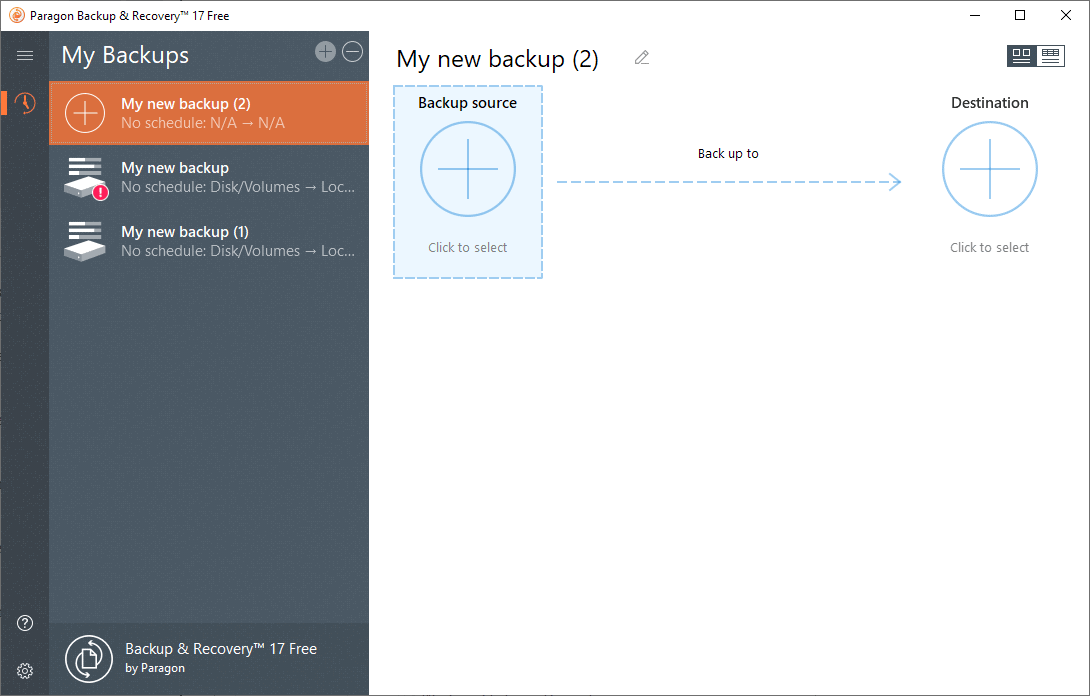
First thing you need to do is create a new backup job. Click on the plus icon in the interface to start the process.

Select backup source afterward to select what you want to back up. Options are to backup the entire computer, individual disks or volumes, or files & folders.
The selection depends on what you want to back up. I suggest you back up the entire c: drive as well as any important data. If all data is on c:, you'd simply select disk/volumes and pick the drive. If you just want to back up personal files, you'd select files/folders instead to do so.
I assume you want to back up the entire c: drive (with the Windows installation files) and describe how you'd do that:
- Select Disk/Volumes to open the disk selection screen.
- Locate the c: drive and select the hard drive in its entirety. You may select additional drives or volumes here as well. Click ok afterward.
- Click on Destination.
- Select a local drive, external drive, or network location for the backup, e.g. F:\Backups and click ok.
- Switch to the Options listing in the main backup job window.
- If you want to protect the backup, enable the Password Protection option so that it is necessary to supply the correct password to access the backup or restore it.
- You can change the container format to VMWare, Virtual PC or Hyper-V images instead of Paragon's own format. The advantage of these formats is that you may load the image in the right virtual machine on Linux to run the operating system or access backed up data. Select VMWare if you want that.
- Other options include changing backup compression and splitting options.
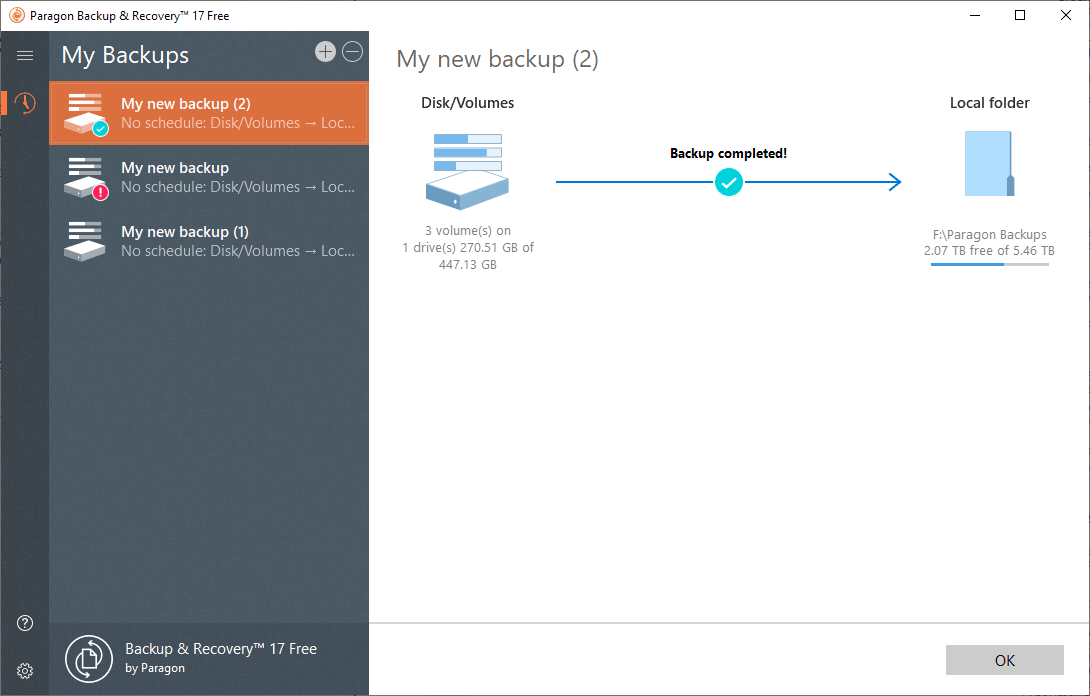
- Once you are done, hit the back up now button to create the backup.
The backup time depends on the data that you have selected, the destination, and other factors such as compression.
You should get a "backup completed" notification after the backup.

We need to create recovery media in the second step as it allows us to restore the backup or data that is on it at a later point in time. Note that this may not be necessary if you plan to mount the backup image in a virtual machine later on.
Select the options button and on the page that opens the Recovery Media Builder option listed in the sidebar. The selection starts the creation process that creates WinPE-based bootable media.
- Select "Use this Windows image (no ADK required) and next on the page that opens.
- Insert Flash media and select it as the destination for the recovery media.
- Follow the on-screen instructions.
You can boot using the media to access the backup at any time.
Creating installation media

Now that you have backed up all important files it is necessary to create installation media for Linux.
Linux users have two main options when it comes to that usually:
- Download an ISO image and burn it to DVD.
- Create USB installation media.
You need to select a Linux distribution. I picked Linux Mint for the tutorial series but others such as Ubuntu, Manjaro or Zorin should work out fine as well.
- Download the latest Linux Mint ISO from the project website. Linux Mint is offered with three different desktop environments: Cinnamon, MATE, and Xfce. Cinnamon's resource usage is a bit higher but it is more modern in many aspects.
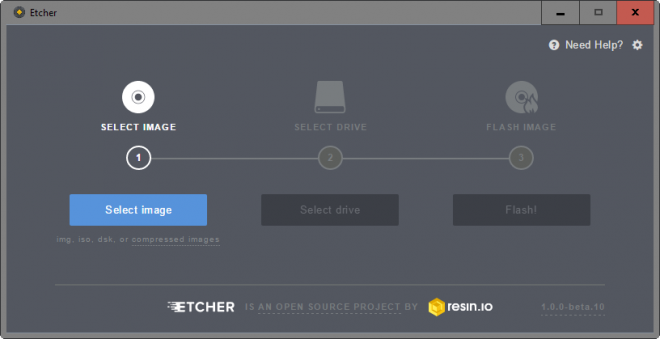
- Download Etcher, a free tool to create bootable media from ISO images. Read our full Etcher review here for additional details.
- Run Etcher.
- Select the Linux Mint ISO image that you downloaded as the source image.
- Select a removable drive, e.g. a Flash Drive, as the destination.
- Click on Flash to start the writing process.
Note: You cannot use the same USB Flash drive that you used to create recovery media for the backup.
Closing Words
We have created a backup of the existing Windows installation and important files, and created Linux installation media in this part of the tutorial.
The next part covers installation of the Linux distribution on the computer.
Now You: Which version of Linux would you pick for Windows users who want to migrate to Linux?
Ghacks needs you. You can find out how to support us here or support the site directly by becoming a Patreon. Thank you for being a Ghacks reader. The post Windows 7 to Linux: Backup and Media creation appeared first on gHacks Technology News.
by Martin Brinkmann via Linux – gHacks Technology News


No comments: