OBS Studio aka Open Broadcaster Software Studio is very popular among YouTube users. You can use it to broadcast gameplay streams live or use it to record videos (which you may then upload to YouTube or other video hosting sites). Want to set up a camera and mic to record content for your vlog? You can do that too.
This is one of those rare applications that is user-friendly on the one hand but still advanced enough to deliver the options that advanced users require. That being said, we're going to take a look at the basic usage of the program, the recording of on-screen content.
OBS Studio is a cross-platform program that is available for Windows, Mac OS X and Linux.

When you run the program for the first time you will see an "Auto-configuration Wizard" prompt. This can help you setup the program for your usage as it may optimize the settings for streaming (with recording as a secondary option) or recording (no streaming).
The wizard also lets you pick the resolution and frame rate per second, both of which are important for recording/streaming gameplay video. OBS Studio can stream directly to Twitch, YouTube, Mixer, Facebook, or Twitter among many other services. The program can be used to authenticate your channel's account to stream content directly to it.
If you choose the auto-config wizard, OBS Studio will determine your system's hardware capabilities and choose a pre-set for the video output (encoder, quality, resolution, fps..). This is recommended if you're new to the video capturing scene.
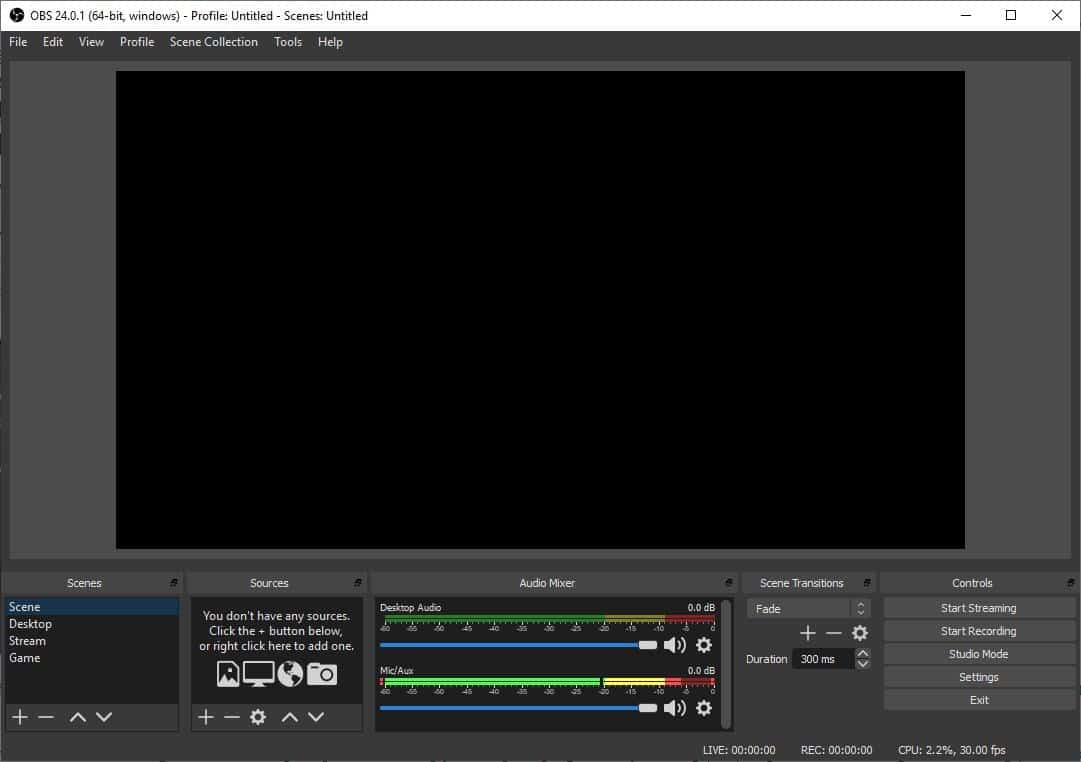
The interface of OBS Studio is quite easy to grasp even for beginners. The menu bar at the top has some advanced options that you can tinker with but can be safely ignored for now. The large pane in the middle is the video preview pane. The bottom of the screen is divided into 5 parts; Scenes, Sources, Audio Mixer, Scene Transitions, Controls.
Video capture
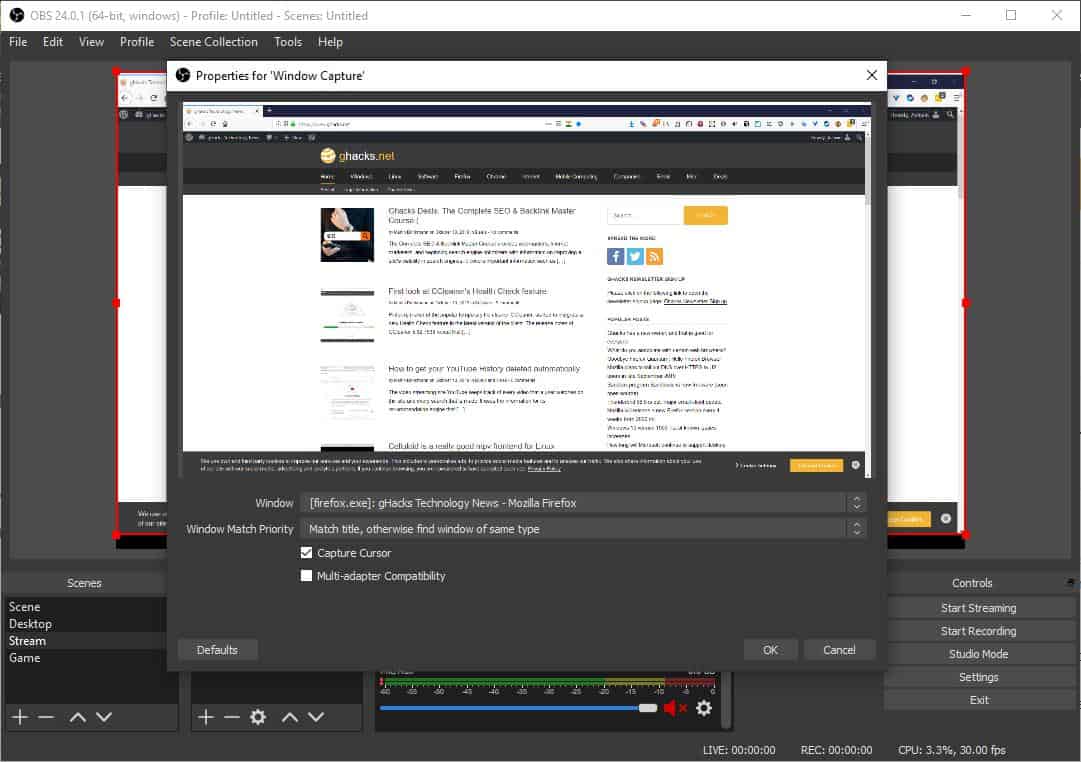
Scenes are a collection of sources. You can have multiple scenes, each containing different sources. The Sources section is where you select the content that you wish to capture. You can select audio, video, images, browser (web URLs), windows (select the program), games (full screen applications) etc. as the source.
Once you select the video source, the preview pane will display a live preview of the content that you wish to capture. For example, if you wish to record your desktop screen, select "Display capture", for gameplay, select game, and so on.

Audio capture
Now that your video source is set up, let's move on to audio. The Audio Mixer can be used to record the Desktop Audio and Mic Audio. These options can be useful if you want to record gameplay audio and want to add your own commentary to it. Or just one of the two. Control the volume using the bars, or mute either or both of them by clicking on the speaker icon. Clicking on the gear cog icon next to the audio bars lets you select the audio source in case you have more than one sound cards.
Finalizing the video settings
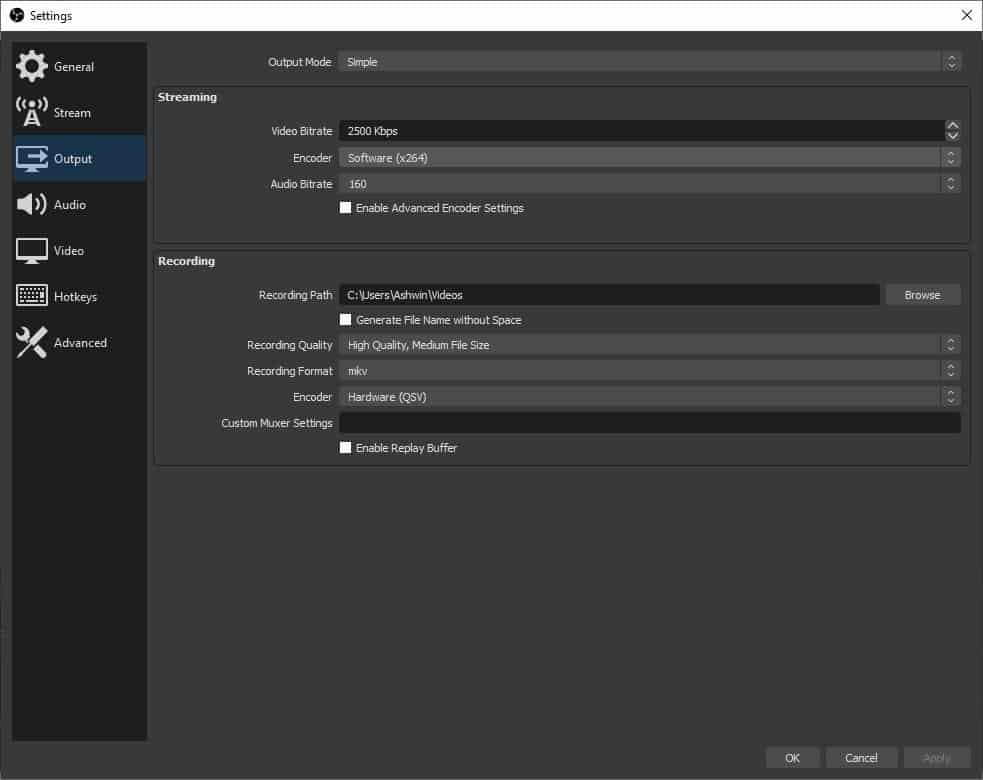
Scene Transitions are useful when switching from one video to another, or if you want to focus on something else. Before we dive to the Controls section, let's go through the Settings. Here you can configure various options for the program.
More importantly, you can define the audio and video input and output settings. Examples include configuring the video output to use x264 encoding, or to save the recording in a format like mkv, mp4, flv or mov. You can also choose the bitrate of the video and audio as per your requirements.
Record or stream
Once you are happy with the settings, hit the Start Streaming button or the Start Recording button (in the Controls section) to start the capturing process. You can pause recordings with the pause button.
Interestingly, this feature wasn't available until a recent update. Click on the stop button and the video will be saved at the location that you selected in the settings.

Closing Words
Please refer to the official website for advanced usage tips, keyboard shortcuts, customization options, etc. It takes time to master the application. The program is easy to use and very powerful at the same time.
OBS Studio is available in a portable version for 64-bit systems. The program runs on Windows 7 and above, macOS 10.11 and newer, Ubuntu 14.04 or newer.
Thank you for being a Ghacks reader. The post OBS Studio is an open source video recorder and streaming app for Windows, Linux and macOS appeared first on gHacks Technology News.
by Ashwin via Linux – gHacks Technology News


No comments: